How to install the Hornetdrive Client for secure cloud storage on Arch Linux

If you are looking for a secure cloud storage service that is hosted in Germany, encrypts your data before it is uploaded into the cloud and has a client that runs on Windows, Mac, Linux and Android, then Hornetdrive is a possible choice. The business account allows for collaboration in a team without charging you for each user, which I find to be the one feature that truly sets it apart from most other offers. In summary, I looked around at the time and found them to be the best choice in terms of features provided and price. I have no affiliation with the company.

Now, the client software is supplied by the company for Windows, Mac and Linux. The linux version comes in two flavours, a .run-file for “RHEL 6 (or derivatives e.g. CentOS 6, Oracle Linux 6) and above, latest versions of Fedora & SUSE Linux” and a .deb-file for “Debian Linux, Ubuntu Linux (latest versions and current Ubuntu LTS release)“.

This post briefly describes how to get a package for arch linux that can then be installed like any other package using the pacman packet manager. The route taken is to use the debtap script/programme to automatically convert the .deb package into an arch package without having to do any work. Well, almost none. I have chosen this path because I have no knowledge of package maintenance myself, and while interested in general, I simply can’t find the time to learn more about it at the moment. So, thank you to the people who created the amazingly useful debtap package.

Here is what you have to do:

  1. Download the hornetdrive client for Ubuntu from the hornetdrive homepage.
  2. Install the debtap package from the AUR. If you are unfamiliar with this process, then please read here for more information. More information on the debtap programme can be found on their github page.
  3. After you have installed the debtap programme, change into the folder that contains the Hornetdrive.deb package and call on it using debtap as follows (no super-user rights required):
    debtap ./Hornetdrive.deb
  4. The programme will ask you for a name for the package. I put “hornetdrive”.
  5. Next it will ask you for the license for the package. At this stage I am unsure what to refer to. The .deb package includes information on “section” and calls it “non-free/net”, so that is what I entered.
  6. The final step asks whether you would like to edit the created .PKGINFO file. Here you have to say yes i.e. choose an editor. This is necessary because arch linux recently unsplit the libdbus package into the core/dbus package, and so we have to make a small change to the dependencies of the automatically generated .PKGINFO file.
  7. When the file is open in your editor, it should look like this:
    pkgname = hornetdrive
    pkgver = 4.1.6-1
    pkgdesc = Sync and share any folder in your file system with HORNETDRIVE. HORNETDRIVE is a highly secure collaboration software which keeps your data synchro
    nised between various computers across Linux/Mac/Windows OS. Sync and share any folder in your file system.
    url = http://hornetdrive.com
    builddate = 1472905315
    packager = hornetdrive
    arch = x86_64
    size = 194796487
    license = non-free/net
    depend = alsa-lib>=1.0.16
    depend = expat>=2.0.1
    depend = fontconfig>=2.9.0
    depend = freetype2>=2.3.9
    depend = gcc-libs>=4.8
    depend = glib2>=2.35.9
    depend = glibc>=2.15
    depend = harfbuzz>=0.9.11
    depend = libcap>=2.10
    depend = libdbus>=1.2.14
    depend = libgl
    depend = libx11>=1.4.99.1
    depend = libxcomposite>=0.3
    depend = libxcursor>1.1.2
    depend = libxdamage>=1.1
    depend = libxext
    depend = libxfixes
    depend = libxi>=1.2.99.4
    depend = libxrandr
    depend = libxrender
    depend = libxtst
    depend = nspr>=4.9
    depend = nss>=3.14.3
    depend = zlib>=1.1.4
    
  8. Find the line that says the following:
    depend = libdbus>=1.2.14
    and change it to this:
    depend = dbus>=1.10.10
  9. Now save / leave the editor, and the script should continue to create the final package. That is it. You now have a functioning package for the hornetdrive client.
  10. To install it, call pacman as follows:
    sudo pacman -U path-to-package
    e.g. in my case:
    sudo pacman -U ./hornetdrive-4.1.6-1-x86_64.pkg.tar.xz
    That is it!

I hope this was helpful.
Cheers.

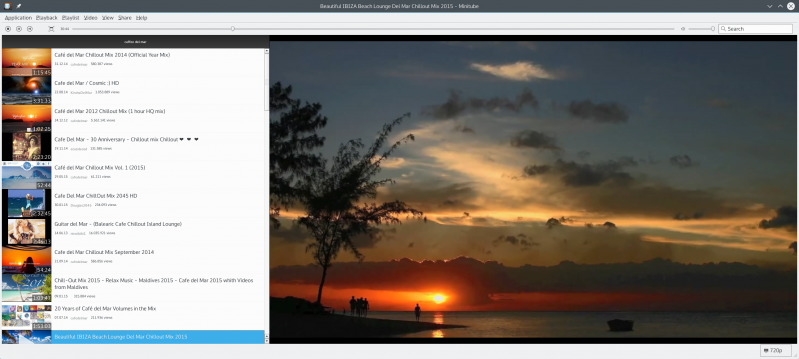
KDE+Plasma & minitube + youtube API-key


I am running arch-linux with KDE and the plasma desktop. I downloaded the minitube application to stream youtube videos outside of the browser. When I started the application it would not work as expected and reported back:

Error downloading https://www.****** server reply:forbidden.

A search online told me that I need a youtube API key to get it to access youtube and work. This can either be set at compile time or in an environmental variable. When installed as a pre-compiled application using the package manager, it sets a file at /etc/profile.d/minitube.sh where the variable may be set.

The api-key may be obtained here as shown at the beginning of this youtube video or described here. Make sure to enable the API key (you may have to create a project to get to this stage) and then create a browser-key, not a server key! Note this key and set it in the minitube.sh file.

Unlike mentioned in some posts, the preset variable name is correct and should be kept at GOOGLE_API_KEY and not changed to APP_GOOGLE_API_KEY. Now you can set the environmental variable by sourcing the file with source /etc/profile.d/minitube.sh or by logging out and back in.

Now, I moved the minitube.sh file from the system wide profile in /etc/profile.d/ into the user profile space at ~/.profile/minitube.sh and that may be the reason for the following problem. In any case, the application only found the GOOGLE_API_KEY variable when started from the terminal. The KDE/Plasma session didn’t have the variable set. I thus set a symbolic link ~/.kde4/env/minitube.sh -> ~/.profile/minitube.sh which solved that problem. Now it works when called as any other application form the desktop.

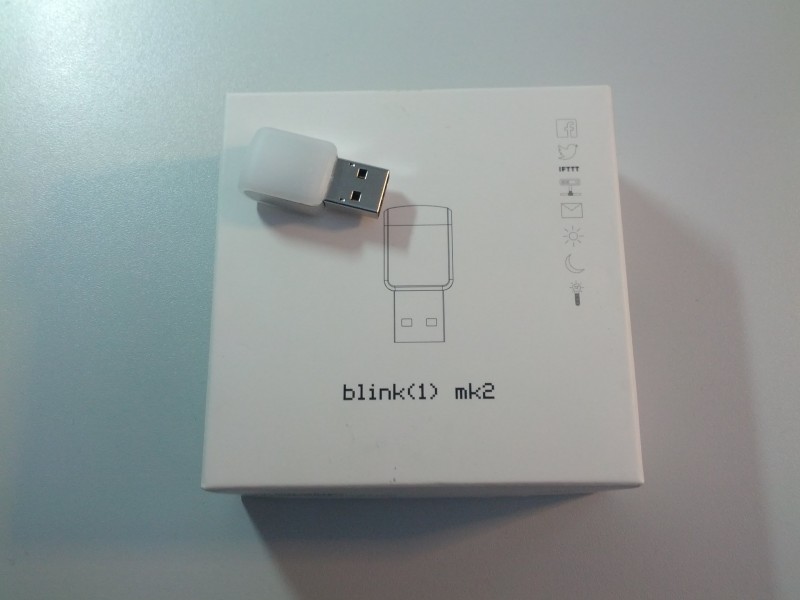
Blink(1) mk2 Gadget

Got myself a blink(1) mk2 gadget to play with. It is currently set up to alert me to new emails with different colours for the different accounts. This is done using the Mailbox Alert add-on for Thunderbird and the blink1-tool command line tool. Very good instructions may be found on this wiki.

Update Jan. 2015

Unfortunately, after enabling the blink(1)_mk2 notification in Thunderbird as described above, my entire system started to freeze up when I got email. Not every time, but repeatedly. I don’t have time to sort it out at the moment, so I disabled the Mailbox Alert add-on in Thunderbird for the moment. The problem has thus gone away, but it remains unsolved.

The Mailbox Alert add-on may not be necessary, since I believe Thunderbird has message filters that can be set on the inbox, and which can run a command when new mail arrives. I tried this, but the problem persisted. Therefore, I believe the problem lies with the blink1-tool command line tool.

Does anyone else have similar experiences, or maybe even a solution? I am open to suggestions.

Import HSBC transaction data into moneyplex

After a lot of trial and error, the following settings allow one to import the transaction data into moneyplex. Any other settings would no import the date information correctly.

  1. Log in to your HSBC online banking and export the transaction data in the “Quicken (QIF)” format.
    hsbc-export-transactions
  2. In the moneyplex programme (the website is in German, and so is my installation. I am unsure whether it exists in the English language) you choose the account into which you want to import the data.
  3. Go to the transaction screen, right click onto the list of transactions and choose “Import” from the selection menu.
  4. Choose the format “QIF-Import von Intuit Quicken 2001 bis 2003 (US-Version)” as the import filter.

This should import the transaction data correctly. At the moment only the recent transactions seem to import successfully from the HSBC website. This is a major pain. Let us hope, that the English banking system can adopt a common standard for the import and export of financial data some time soon. After all, Germany has had this for a while now.

[solved] Linux software RAID-1 fallover problem.

Note: this is a partial post. I may fill in more information at a later time. However, the solution is stated at the bottom and may be helpful already.

The Problem history

A few days ago I set up a rsnapshot backup solution and when i ran it for the first time, my linux software raid-1 (2x 3TB – 6GB/s SATA) fell over. It wasn’t tragic, since after a reboot it simply re-synced. However, this happened reliably every time I did a backup and then the re-syncs started to fail as well.

Turns out my motherboard (Asus P7H57D-V EVO) is using a Marvell 88SE6111 chip for the two SATA 6GB/s SATA connectors it provides and which I am using for the two disks in question. All my other disks are attached to an intel chip that only offers SATA 3GB/s connections. This Marvell chip seems to have poor support under linux. However, the controller is set in the BIOS to work via AHCI and the disks do work under normal conditions without a problem.

The current kernel is stated below:

Linux 3.10.7-1-ARCH x86_64 GNU/Linux

I checked the disks (both are new) using smarctctl and found no issues. When the raid was synced, everything worked fine and the smartctl command showed good new disks. Once the backup had toppled the raid or the re-sync failed, smartctl failed with the following errors shown in dmesg:

[ 7483.951154] program smartctl is using a deprecated SCSI ioctl, please convert it to SG_IO
[ 7483.951179] program smartctl is using a deprecated SCSI ioctl, please convert it to SG_IO

Checking dmesg for a hint on why the disks/raid failed, I found the following errors (the relevant hard drives are /dev/sdf and /dev/sde. (… marks sections where I cut repetitions):

[ 1128.512259] ata7.00: exception Emask 0x0 SAct 0xffff SErr 0x0 action 0x6 frozen
[ 1128.512268] ata7.00: failed command: READ FPDMA QUEUED
[ 1128.512277] ata7.00: cmd 60/00:00:80:67:95/01:00:0f:00:00/40 tag 0 ncq 131072 in
res 40/00:00:00:00:00/00:00:00:00:00/00 Emask 0x4 (timeout)
[ 1128.512281] ata7.00: status: { DRDY }
...
[ 1128.512481] ata7.00: failed command: READ FPDMA QUEUED
[ 1128.512488] ata7.00: cmd 60/80:78:00:5e:95/00:00:0f:00:00/40 tag 15 ncq 65536 in
res 40/00:00:00:00:00/00:00:00:00:00/00 Emask 0x4 (timeout)
[ 1128.512492] ata7.00: status: { DRDY }
[ 1128.512499] ata7: hard resetting link
[ 1129.002169] ata7: SATA link up 6.0 Gbps (SStatus 133 SControl 370)
[ 1129.003682] ata7.00: configured for UDMA/133
[ 1129.003793] ata7.00: device reported invalid CHS sector 0
[ 1129.003798] ata7.00: device reported invalid CHS sector 0
...
[ 1129.003905] ata7: EH complete
[ 1611.769630] ACPI: EC: GPE storm detected(10 GPEs), transactions will use polling mode
[ 2161.457698] ata8.00: exception Emask 0x0 SAct 0x7ff SErr 0x0 action 0x6 frozen
[ 2161.457709] ata8.00: failed command: WRITE FPDMA QUEUED
[ 2161.457718] ata8.00: cmd 61/00:00:80:c4:2c/02:00:1e:00:00/40 tag 0 ncq 262144 out
res 40/00:00:00:00:00/00:00:00:00:00/00 Emask 0x4 (timeout)
[ 2161.457723] ata8.00: status: { DRDY }
...
[ 5628.308982] ata8.00: failed command: WRITE FPDMA QUEUED
[ 5628.308990] ata8.00: cmd 61/80:50:80:34:44/01:00:50:00:00/40 tag 10 ncq 196608 out
res 40/00:00:00:00:00/00:00:00:00:00/00 Emask 0x4 (timeout)
[ 5628.308993] ata8.00: status: { DRDY }
[ 5628.309000] ata8: hard resetting link
[ 5638.311674] ata8: softreset failed (1st FIS failed)
[ 5638.311686] ata8: hard resetting link
[ 5648.314623] ata8: softreset failed (1st FIS failed)
[ 5648.314633] ata8: hard resetting link
[ 5683.316659] ata8: softreset failed (1st FIS failed)
[ 5683.316671] ata8: limiting SATA link speed to 3.0 Gbps
[ 5683.316675] ata8: hard resetting link
[ 5688.319776] ata8: softreset failed (1st FIS failed)
[ 5688.319788] ata8: reset failed, giving up
[ 5688.319792] ata8.00: disabled
[ 5688.319798] ata8.00: device reported invalid CHS sector 0
[ 5688.319802] ata8.00: device reported invalid CHS sector 0
[ 5688.319805] ata8.00: device reported invalid CHS sector 0
[ 5688.319808] ata8.00: device reported invalid CHS sector 0
[ 5688.319811] ata8.00: device reported invalid CHS sector 0
[ 5688.319814] ata8.00: device reported invalid CHS sector 0
[ 5688.319816] ata8.00: device reported invalid CHS sector 0
[ 5688.319819] ata8.00: device reported invalid CHS sector 0
[ 5688.319822] ata8.00: device reported invalid CHS sector 0
[ 5688.319825] ata8.00: device reported invalid CHS sector 0
[ 5688.319828] ata8.00: device reported invalid CHS sector 0
[ 5688.319897] ata8: EH complete
[ 5688.319932] sd 7:0:0:0: [sdf] Unhandled error code
[ 5688.319936] sd 7:0:0:0: [sdf]
[ 5688.319939] Result: hostbyte=0x04 driverbyte=0x00
[ 5688.319942] sd 7:0:0:0: [sdf] CDB:
[ 5688.319944] cdb[0]=0x8a: 8a 00 00 00 00 00 50 44 34 80 00 00 01 80 00 00
[ 5688.319960] end_request: I/O error, dev sdf, sector 1346647168
[ 5688.320033] sd 7:0:0:0: [sdf] Unhandled error code
[ 5688.320037] sd 7:0:0:0: [sdf]
[ 5688.320040] md/raid1:md3: Disk failure on sdf1, disabling device.
md/raid1:md3: Operation continuing on 1 devices.
[ 5688.320045] Result: hostbyte=0x04 driverbyte=0x00
[ 5688.320048] sd 7:0:0:0: [sdf] CDB:
[ 5688.320049] cdb[0]=0x8a: 8a 00 00 00 00 00 50 44 32 00 00 00 02 80 00 00
[ 5688.320063] end_request: I/O error, dev sdf, sector 1346646528
[ 5688.320076] sd 7:0:0:0: [sdf] Unhandled error code
[ 5688.320079] sd 7:0:0:0: [sdf]
[ 5688.320081] Result: hostbyte=0x04 driverbyte=0x00
[ 5688.320084] sd 7:0:0:0: [sdf] CDB:
...
[ 5688.320349] cdb[0]=0x8a: 8a 00 00 00 00 00 50 44 26 80 00 00 02 80 00 00
[ 5749.344064] ata7.00: exception Emask 0x0 SAct 0x0 SErr 0x0 action 0x6 frozen
[ 5749.344075] ata7.00: failed command: FLUSH CACHE EXT
[ 5749.344087] ata7.00: cmd ea/00:00:00:00:00/00:00:00:00:00/a0 tag 0
res 40/00:00:00:00:00/00:00:00:00:00/00 Emask 0x4 (timeout)
[ 5749.344092] ata7.00: status: { DRDY }
[ 5749.344101] ata7: hard resetting link
[ 5759.350285] ata7: softreset failed (1st FIS failed)
[ 5759.350296] ata7: hard resetting link
[ 5769.353267] ata7: softreset failed (1st FIS failed)
[ 5769.353277] ata7: hard resetting link
[ 5804.351941] ata7: softreset failed (1st FIS failed)
[ 5804.351953] ata7: limiting SATA link speed to 3.0 Gbps
[ 5804.351957] ata7: hard resetting link
[ 5809.351710] ata7: softreset failed (1st FIS failed)
[ 5809.351723] ata7: reset failed, giving up
[ 5809.351727] ata7.00: disabled
[ 5809.351733] ata7.00: device reported invalid CHS sector 0
[ 5809.351759] ata7: EH complete
[ 5809.351815] sd 6:0:0:0: [sde] Unhandled error code
[ 5809.351820] sd 6:0:0:0: [sde]
[ 5809.351822] Result: hostbyte=0x04 driverbyte=0x00
[ 5809.351826] sd 6:0:0:0: [sde] CDB:
[ 5809.351828] cdb[0]=0x8a: 8a 00 00 00 00 00 00 00 08 08 00 00 00 01 00 00
[ 5809.351844] blk_update_request: 1 callbacks suppressed
[ 5809.351847] end_request: I/O error, dev sde, sector 2056
[ 5809.351852] end_request: I/O error, dev sde, sector 2056
[ 5809.351855] md: super_written gets error=-5, uptodate=0
[ 5809.352927] md: checkpointing resync of md3.
[ 5809.352987] sd 6:0:0:0: [sde] Unhandled error code
[ 5809.352993] sd 6:0:0:0: [sde]
[ 5809.352997] Result: hostbyte=0x04 driverbyte=0x00
[ 5809.353002] sd 6:0:0:0: [sde] CDB:
[ 5809.353005] cdb[0]=0x8a: 8a 00 00 00 00 00 00 00 08 08 00 00 00 01 00 00
[ 5809.353027] end_request: I/O error, dev sde, sector 2056
[ 5809.353032] end_request: I/O error, dev sde, sector 2056
[ 5809.353036] md: super_written gets error=-5, uptodate=0
[ 5809.353140] sd 6:0:0:0: [sde] Unhandled error code
[ 5809.353146] sd 6:0:0:0: [sde]
[ 5809.353150] Result: hostbyte=0x04 driverbyte=0x00
[ 5809.353155] sd 6:0:0:0: [sde] CDB:
...

The way I read this was as follows. The physical symptoms are that the raid stops to respond for about 30 seconds, and then works again. These freeze problems then lead to a timeout on the rsync backup or the re-sync action. The cause for the freeze may ultimately be the Marvell controller (since my software raid-5 with 3 disks on the Intel chip has no such problems), but it may well be due to an overload during backup / sync_action.

My solution to the problem

Since I could not find a better driver for the Marvell chip, and since hours of research on the web did not yield a better solution, I decided to prevent the cause instead of curing it. It seems that the software raid only falls over when it is under immense load, such as during a re-sync or when the rsnapshot tool is continuously spitting data at the raid. By setting bandwidth limits for the mdadm sync_action and the rsync tool underlying the rsnapshot software, I was able to prevent the problem from occurring again.

Setting a bandwidth limit on the mdadm re-sync action as described here:

sysctl -w dev.raid.speed_limit_max=value

I chose the value of 124000, which is slightly lower than the speed stated by mdstat during successful syncing i.e. before the re-sync action overloaded the raid. To get that value, type the following while the raid is happily re-syncing:

$ cat /proc/mdstat

Check the current limits for the resync action:

# sysctl dev.raid.speed_limit_min
# sysctl dev.raid.speed_limit_max

To permanently override the default, I added this line to /etc/sysctl.conf:

## New max limit to prevent raid failure
dev.raid.speed_limit_max = value

To prevent rsnapshot from overloading the raid during a backup, I set the bwlimit parameter in the rsnapshot config file at /etc/rsnapshot.conf. As you can see, I also set a 3min timout to give the raid some time to unfreeze, should that happen again:

# Default rsync args. All rsync commands have at least these options set.
rsync_long_args	--delete --numeric-ids --relative --delete-excluded --timeout=180 --bwlimit=12000

I have since run a backup and found no problems.

Ammendment (2013-08-30)

While the raid system has not fallen over since I implemented the fix described above, the underlying problem with the hdd-freeze and timeout issues has not been resolved!!

Resizing the filesystem on an encrypted logical volume ontop of a software RAID

Warning: This is not a tutorial. It is just a story that explains a problem and provides the solution.

I had a few “D’oh!”-*slap your forehead* moments today when I increased the size of my data volume, and since I didn’t find any good information on some of the issues during my google searches, here is a short blog-post to commemorate the occasion and help fellow users.

I am using lvm, linux’s logical volume manager on this machine, and one of the volume groups (vg) sits on a software raid /dev/md0 that used to span 3 physical hard disk drives and which I now increased to span those three drives and an additional partition on a 4th drive. This is not ideal, however the three old drives are each of the same type and 750GB in size, whereas the new one is a single 1TB drive of a different make. To buy the same 750GB drive again would be more expensive then to buy a new drive with more than 1TB capacity, and I had one of those spare. So, I partitioned the 1TB drive into a 750GB partition and an additional partition for misc. purpose. The 750GB partition was then added to the software raid. This was no problem, and after additing the 750GB partition as a spare device, I extended the raid to span 4 active devices (3 HDD + 1 partition).

At this point, the raid had additional space, but I could not yet use it.
If I wasn’t using lvm, I could have just grown the size of my file system partition to cover the additional space available on the raid device (/dev/md0). Since I am, however, using lvm, the device to resize is the lvm volume group that covers the raid device, in my case that is “dat” i.e. /dev/dat/.

Calling vgdisplay as root before and after you extend the vg, should show you that the available free space in the volume group increased.

Once the volume group is grown to cover the whole of /dev/md0 using the “vgextend” command, the additional space may be attributed to any logical volume in that volume group, in my case /dev/dat/data. Use

lvextend -l +100%FREE /dev/yourvg/yourlv 

command to increase the size of yourlv to cover all the free space in the volume group.

Now I had a logical volume with 2.05TB of space, but in Nautilus it only showed 1.4TB as before. This is where, unlike previously, I got stuck. On the web they talked about resizing your file system, which in my case sits in a logical volume, that sits in the volume group, that sits in the raid device. However, when I tried to resize the filesystem, I got the following error message:

resize2fs -p /dev/mapper/dat-data
resize2fs 1.42.4 (12-June-2012)
resize2fs: Device or resource busy while trying to open /dev/mapper/dat-data
Couldn't find valid filesystem superblock.

You see that I did not make the mistake of calling resize2fs on the /dev/dat/data, which is the logical volume, but instead I called it (correctly I think) on the file structure inside, accessable through /dev/mapper/. Unmounting the data volume did not help, and I could not find a helpful post online about this problem either.

Ultimately, the “Couldn’t find valid filesystem…” message made me realise that since I was using an encrypted logical volume, my filestystem is in fact mapped under /dev/mapper/cr_data. With this epiphany, it was no problem to call e2fsck and resize2fs on /dev/mapper/cr_data after which the additional space was available in my file manager.

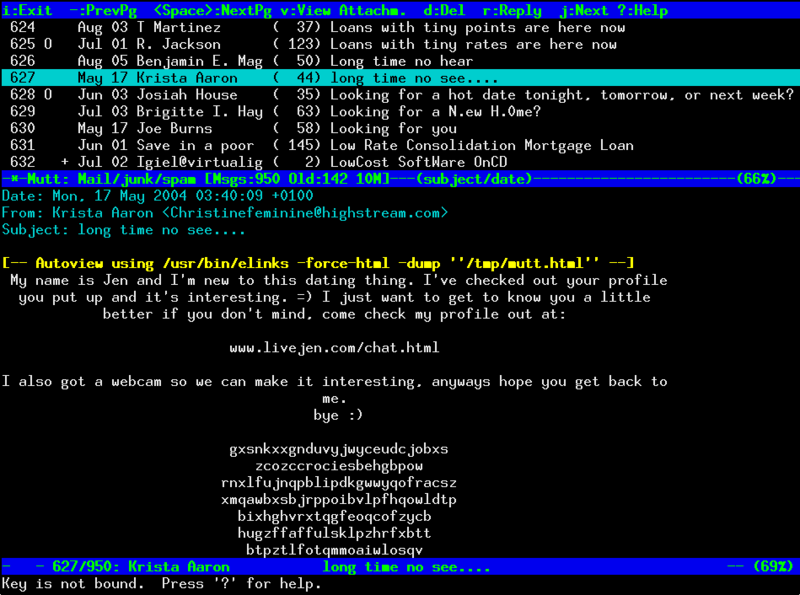
mutt + notmuch : searching multiple mailboxes in mutt

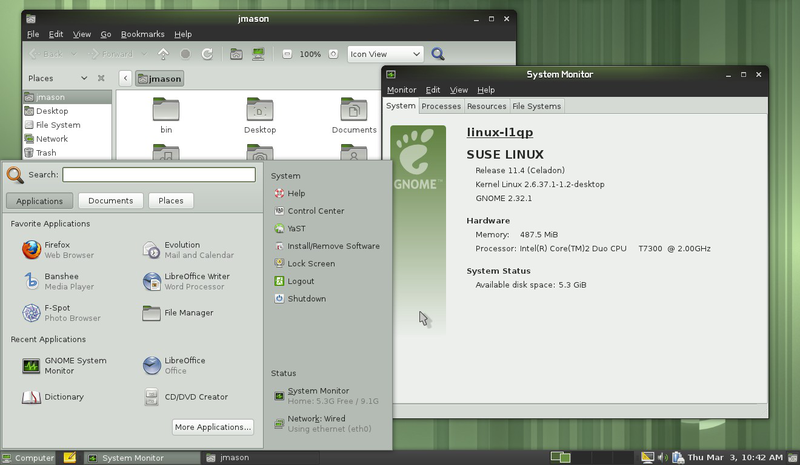
This post explains the installation of the email indexing programme notmuch and its integration with the mutt email programme under openSuSE 11.4.

I have recently changed the way I use email. Previously, I had my email auto-sorted into folders, which meant that I had unread emails scattered over several folders and often neglected to read emails in categories that I felt were not immediately important.
In order to change that, I emptied my INBOX, which contained hundreds of unsorted messages, and moved them all into folders. It is now my resolution to work through my email once it comes in, and then move it into an appropriate folder. This way I should keep a nice and empty INBOX and I know that anything which is still in there, has yet to be addressed.

However, mutt does not allow you to search in more than one mailbox at a time. Now, if I need to look up a certain email, I would have to run the same search in all my folders. This is unacceptable. To address the issue, I looked into indexers that work with mutt. After reading zack’s post from 2009 on mairix, maildir-utils and nmzmail, and his newer post on notmuch, I decided to go with notmuch.

Notmuch is not currently in any of the openSuSE repositories, so you will have to grab it from the web. I simply google searched for “notmuch rpm” and found the latest version (notmuch-0.5-4.fc15.i686.rpm) on http://rpm.pbone.net

The following dependencies have to be satisfied:

  • libgmime-2.6
  • libtalloc (version > 2.0.2)


libgmime

This requirement may be fulfilled by installing the gmime-2.5.1-4.fc15.i686.rpm (this is a fedore package from http://rpm.pbone.net)

libtalloc

libtalloc may be found in the openSuSE online package search. I used the
libtalloc-2.0.5-8.fc15.i686.rpm package from http://rpm.pbone.net. Make sure that the installed version of libtalloc is 2.0.2 or higher.

other

The following packages aren’t required at the time of the installation, but if you later get an error when you first try to use notmuch from mutt, then it may be because you are missing the following packages:

  • perl
  • perl-MailTools
  • perl-Email-Sender
  • perl-Mail-Box

You will also need libxapian and sqlite3, but those dependencies may be resolved automatically when you install notmuch.

setup and indexing

Now that notmuch has been successfully installed, you need to run the configuration and then the indexing. In order to run the setup, open a terminal and enter “notmuch setup”, then press enter. This will take you through a short setup procedure which should be self-explanatory.

Once the setup is complete, it asks you to start the indexing by executing “notmuch new” in the terminal. Depending on how much mail you have, this may take some time. Future indexing is done incremental and will only take a very short time.

notmuch integration with mutt

As explained in Zack’s post, you should download the mutt-notmuch script and save it to a location of your choice. Then make it executable by the user (chmod u+x ./mutt-notmuch). Now you only need to include a macro in your mutt configuration file. The instructions are here.

notmuch integration with offlineimap

You could use a cron job to repeatedly run the “notmuch new” command, but I personally prefer to use the posthook command in the offlineimap configuration file. This way, every time I gab new mail, the indexer runs automatically. Since I grab mail from several imap servers, I set the number of simultaneous connections to 1 in the offlineimaprc config file (maxconnections = 1), this way offlineimap works through the accounts one after the next and I simply set the postsynchook in the last account i.e.

[Account last-account]
postsynchook = notmuch new

Alternatively you could write a short bash script, first calling offlineimap and then notmuch new

Now, if all went well, you should be able to call a search from within mutt simply by pressing the F8 key. It works wonderfully for me.

Panasonic CF-51 Toughbook: No sound or hotkeys.

If you ever find yourself in front of a Panasonic CF-51 toughbook running Windows XP, you may encounter the following situation.

You installed all the latest updates from the Panasonic website, but neither the sound nor the hot-keys work.

If you check the hardware-manager, you may find an unknown device left over, which upon closer examination, seems to have something to do with the ACPI. I believe it was called “ACPI MAT0019”. It is in fact the Panasonic hot-key device for which the driver wasn’t installed correctly and which you have to install manually.

Before you go and install the driver for the hot-keys, be sure to check that you have installed the other two parts of the hot-key situation. The correct order seems to be to install the hot-key app first, then the hot-key settings application and finally the driver.

You can find the driver and other applications on the Panasonic website or alternatively you may want to look here. To install proceed with the manual installation, you go to the hardware manager (System settings->System (select the hardware tab), then click on the hardware manager button). Select the unknown device, click on “Update Driver”, select the manual installation route and then select the folder to which you downloaded the driver. The installation should complete successfully and upon restart, the hot-keys as well as the sound should work. This presumes that not only did you installed the sound driver correctly beforehand but, if I remember correctly, the hot-key driver installation outlined above is the third step in installing the hot-key device. First you have to install the hotkey-app, then the hot-key settings and finally the driver as outlined above.

openSUSE 11.2 linux on Intel Core i3 with Intel HD Graphics

I bought I new PC system, based on a motherboard with the H57 chipset and the intel core i3 530 CPU. After a faultless installation of openSUSE 11.2, I had some initial problems getting the integrated Intel HD graphics to work. A kernel update to linux kernel-2.6.34-35 using the latest openSUSE 11.3 Milestone7 DVD, solved the problem for me. Read on for a few more details.

The System

The components for my new PC arrived last week and I finally got a chance to put it all together last night. The system components were chosen with low-energy consumption and silent operation in mind.  The specs are as follows:

  • ASUS P7H57D-V EVO motherboard
  • Intel Core i3 530 2.93GHz Socket 1156
  • Zalman CNPS10x Flex CPU cooler (intended to operating without fans)
  • 2x Crucial 1GB DDR3
  • OCZ 400W Stealth XStream PSU (140mm Fan for silent operation)
  • Seagate Barracuda LP ST3500412AS 500GB HD SATA2 5900 rpm 16MB Cache

Evidently, I did not really see the low-energy idea through to the end. If I had, I would have traded the ATX motherboard for one of the mini-ITX LG1156 motherboards from ZOTAC.

Installing openSUSE 11.2

The installation from an openSUSE 11.2 DVD completed without problems. It was only on the first boot-up, that the problem with the integrated Intel HD Graphics became apparent. The system attempted to start the X server, but just flashed the screen a few times and then reverted to a console login.

The solution

openSUSE 11.2 (kernel-2.6.34-25)

openSUSE 11.2 (kernel-2.6.34-25) on intel core i3

Reading some more information on the internet revealed that the problem could most likely be solved by a kernel upgrade and/or that of the xf86-video-intel graphics driver. The trouble is, that the most current kernel for openSUSE 11.2 is still the kernel-2.6.31 release.

So in short, the solution was to download last nights build of the very latest and greatest openSUSE 11.3 Milestone7 DVD using wget from the console. I then started YAST in the graphical console mode and added the openSUSE 11.3-Milestone7-DVD iso-file as a repository. After this, the new kernel-2.6.34.35 shows up in the normal YAST Software Management tool, and can be installed like any other package. A reboot of the system presented me with the lovely green login-screen of an openSUSE 11.2 installation. The graphics now work, wobbly windows, animations, cube-switcher and all. The current kernel is 2.6.34-35-default.

Notice, that I haven’t yet upgraded the xf86-video-intel driver. I am going to do that next , just for fun.

INKredible also credible.

When I was looking for new ink cartridges last night, I found the website INKredible.co.uk and they had a really good price against a very promising looking set of replacement cartridges. Unfortunately, when I got to the checkout stage, my SSL-Blacklist Extension in Firefox warned me about a connection based on md5 which is not deemed secure any more. I dropped them a ticket explaining the situation and within less than 24 hours they had re-issued their certificate and notified me of the changes. Since I had been unwilling to spend more money on a similar product somewhere else, I promptly went and bought the set of cartridges I had had in mind before. I love good customer service, I am sure we all do, and so I thought I put this little praise out there. Maybe it will help other people make a more informed decision, who knows.